Thursday, September 29, 2011

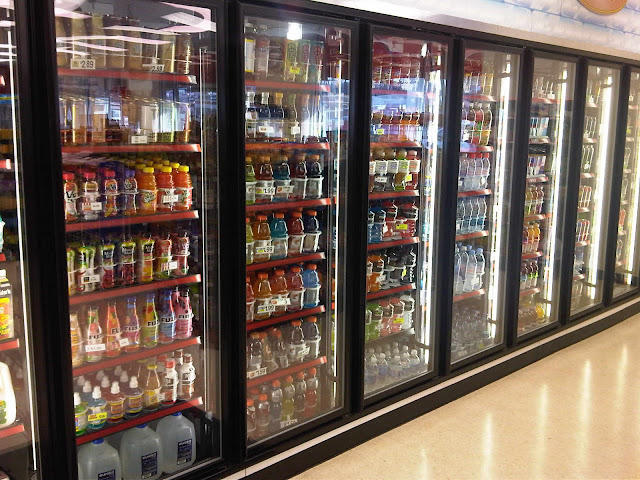
My Glass Display Doors Are Popping Open!

Why it happens:

Our walk in coolers are structurally solid and fully gasketed. When properly installed they will form an air-tight unit. When any of the doors are closed suddenly, an air-hammer effect can be created inside the walk in cooler. There will be a positive pressure formed, and this pressure will be released at the point of least resistance. This point is generally the glass display doors, since they are held in place by only the magnetic strips within the gaskets. If the closing tension of the doors is too light, they may stay open, wasting energy.

walk in cooler door torquemaster

What you can do:

This is a relatively easy problem to fix. The bottom hinge mechanism of the Anthony glass display doors is called a Torquemaster. The screw on the face of this mechanism allows you to easily adjust the closing force of the walk in cooler doors. Adjust the screw counter-clockwise to increase the tension. Do not adjust to the point of the door slamming—this can cause problems down the road with the doors.

There is also a screw on the edge of the mechanism. This screw allows you to adjust the square of the walk in cooler door within the frame.

If adjustment of the front screw has no effect, and the walk in cooler door swings loosely with no tension at all, then the torque rod may be broken within the door. This is an easy part to replace; call our service department (800-521-0398 or 586-254-0610) to order the correct rod.

Tuesday, September 20, 2011

How to Properly Seal Walk in Cooler Doors

SLIDING GLASS DOOR MODELS:

All walk in coolers must be level for sliding glass doors to seal properly. If the floor is not level, there may be gaps at the top or bottom of the door seal against the cabinet sidewall. There may also be gaps on the overlap seal from door to door. In addition, the doors will be unable to glide freely and bind instead. Leveling is not a service performed by delivery personnel. Walk in coolers are manufactured to rest on a sturdy, smooth, and level floor. The longer the cabinet, the more it may be affected.

LEVELING YOUR WALK IN COOLER:walk in cooler - sliding doors

If a smooth and level floor is not available, the walk in cooler will have to be shimmed to compensate for any floor irregularities. First, get a collection of wood squares of assorted thickness. You will also need a 4' carpenter’s level and a tape measure.

1. Using the level, determine the slope of the floor. This will tell you which end is the highest. You will want to raise the rest of the walk in cooler until it is level with this end.

2. Next, hold your level flush against the face of the display against the highest end. This will tell you if the walk in cooler is leaning either forward or back.

3. Now you can start to insert shims under the cabinet supports to raise the walk in cooler into position. All four corners of the cabinet may need to be shimmed, as well as the center, both front and back. It will be helpful if two people level. One person can tip the display, while the second person can insert the shims.

4. You will be finished when your carpenter’s level can be placed anywhere against any of the horizontal or vertical surfaces and read perfectly plumb. A final test can then be made. Measure the doorframe assembly from the lower left corner to the upper right corner, and compare this measurement to the opposite corner-to-corner measurement. They should be exactly the same. If they are off, the walk in cooler is still not level. The bottom rail of the doorframe should also be perfectly straight with no sag or bow.

FINAL ADJUSTMENTS TO WALK IN COOLER DOORS:

Leveling your walk in cooler will generally solve ninety percent of seal problems. In rare cases, individual adjustment to the doors themselves may be necessary. If your walk in cooler is now perfectly square, and one of your doors is now out of square in the frame, the following procedure can usually be performed.

1. Remove the door from the display by lifting it up and swinging the bottom of the door out free from the bottom rail.

2. Once the door is removed, you can shim the individual door rollers with washers to square the door within the frame.

Tuesday, September 13, 2011

Adjusting Your Walk in Cooler's Temperature

"Help! My product is freezing. What should I do? How do I adjust the temperature and what should I set it to?"

Here’s what’s going on: Air directly exiting the evaporator coil is approximately 10 degrees colder than the overall temperature in your walk in cooler. So, products placed too close to the coil may be damaged. You could adjust your shelving positions or make a temperature adjustment to warm the overall display. It should be operating between 38 to 42 degrees Fahrenheit. Read below for instructions on how to adjust your walk in cooler’s temperature!

If this does not remedy the problem, perform routine maintenance (read here for help with that). Ensure that the condenser coil is clean and make a slight temperature adjustment to warm your walk in cooler a few degrees. If there is no change, and the compressor is running continuously, there may be a problem with the control system. Place a service call to have your walk in cooler examined.

For more information about possible causes, read HVAC Fun's "Troubleshooting a Frozen Refrigeration Evaporator Coil", or check out our post, "My Walk in Cooler is Blowing Warm Air!"

BEFORE YOU ADJUST THE TEMPERATURE:

First, determine what the true temperature is in your walk in cooler. Immerse a floating aquarium thermometer in a vase of water somewhere inside. This will give an accurate reading as to the current set point. As stated previously, we recommend a setting somewhere between 38 to 42 degrees Fahrenheit for optimum performance. Perform normal preventative maintenance prior to any temperature adjustment being performed. Adjustments should not be made to compensate for poorly maintained equipment.

Now, if your product is freezing, you're probably not going to be lowering the temperature of your walk in cooler. However, I wanted to make this a complete guide, so it's important I mention these next few cautionary tips. Consideration should be given to these factors prior to lowering the temperature of your walk in cooler:

1. Each degree you lower the temperature will consume more energy, leading to higher bills.
2. Compressor run times will increase, decreasing the lifetime of the walk in cooler equipment. More heat and noise will be generated in your store.
3. The possibility of freezing product or iced coils will increase. Product loss wastes time and money—and is not covered by any equipment warranties.

ADJUSTING THE TEMPERATURE CONTROL:Miljoco Temperature Control

IMPORTANT: These controls are very sensitive, so only make small adjustments, and let the temperature stabilize over a few hours. Don’t make any further adjustments before this.

If you determine that an adjustment is required, here are 3 steps to help you do so:

1. Locate the temperature control. Since it is supplied as a loose part for field installation, it may be mounted anywhere on your walk in cooler. Most typically, it will be mounted within the walk in cooler. It is a small unit, usually with two scales, adjustment screws, and a copper sensing probe off the bottom. Electrical conduit will enter the bottom of the control.

*** Be careful! All of our walk in coolers are also equipped with pressure controls and can appear very similar to temperature controls. They are usually mounted as part of the condensing unit. Only trained technicians should adjust these controls. The scales of pressure controls always refer to pressure (P.S.I., bar, etc.) rather than degrees of temperature.

2. There are two scales on the control. One scale measures the set point and the other scale shows the differential. The temperature swing or range of your walk in cooler is determined by the control set point, plus or minus the differential setting, depending on what model you have. It is usually not necessary to adjust the differential of the control.

3. There will be either a screw or a knob located directly above both scales. Turn the adjusting screw above the temperature scale to move the indicator towards the desired setting. Remember to move the indicator in only small increments at a time.

Friday, September 9, 2011

A Few Updates!

SRC has made a few updates to our main website! We added a completely new gallery with several different albums, including walk in coolers/freezers, reach in coolers, and walk in cooler doors. We always love receiving pictures from our customers of their newly installed walk in and reach in coolers, so please, don't hesitate to email us! You can see a list of our email addresses here.

In addition, we've updated our references & testimonials. :)

We will be adding another new album to our gallery soon, so keep a look out! What the album will contain is a surprise!

Thursday, September 1, 2011

My Walk in Cooler is Blowing Warm Air!

Yikes! Your walk in cooler certainly shouldn't be blowing warm air. To begin, visually inspect the evaporator coil. Are the fins iced over?

Frozen Evaporator Coil vs. Normal

If they are iced over, then either shut the walk in cooler down completely, or make a temperature adjustment to the warmest position (this shortens the defrost time). Leave the unit alone until the evaporator coil is completely free of ice—this may take a while if the build-up was heavy. Never attempt to manually defrost or remove built-up ice by hand or with tools as it could easily cause a refrigerant leak! Once clear, reset the temperature control to the correct range (38 to 40 degrees Fahrenheit).

If the evaporator coil is not iced over, or if the icing occurs again, place a service call to determine and correct the cause of the problem.

If the problem is temporary, the unit may have just been in a defrost period. Just to be safe, the settings on the defrost timer should be reviewed and adjusted if necessary.

More importantly, make sure you keep up to date on performing routine maintenance on your walk in cooler. There are some good tips in our post "How to Clean Your Walk in Cooler (5 Guidelines)"!

Wednesday, August 24, 2011

How to Clean Your Walk in Cooler (5 Steps!)

Normal maintenance on our walk in coolers is very easy. Well-maintained walk in coolers will experience very few mechanical failures, run efficiently, and last for a long time. It pays to uphold a regular cleaning schedule for your walk in cooler. You can determine how often your walk in cooler needs to be cleaned by the amount of use and how dusty the environment is. To begin with, though, we've complied five major guidelines that will help keep your walk in cooler running as efficiently as possible...

MONTHLY:

Shop Vac1. Clean the condenser coil of your condensing unit. First of all, it is considerably safer if you shut off the circuit breaker while you clean. A good way to clean your condensing unit is with a shop-vac (pictured to the left). Not only can you vacuum the surface, but also you can reverse the flow of air to blow deeply imbedded dust out from the center of the coil—blow it out from both directions as best you can. You can then wipe off the housing and compressor with a damp rag. This simple maintenance is the single most important thing you can do for your walk in cooler.

2. Clean the interior of your walk in cooler. Avoid using harsh cleaners that can damage the painted finish over time. Mild soap and water will normally be sufficient, especially if done on a regular basis. Hard water stains can be cleaned with a mixture of white vinegar and water; bleach and water can be used to clean mildew and mold. If you notice any of the caulk seals coming loose, pull them free. You can pick up small tubes of silicone at any hardware store to reseal the joint.

3. Check to make sure that the doors are sealing tightly to your walk in cooler. A visual inspection is all that is normally needed. You should be able to close the door on a dollar bill, and feel resistance when you pull the bill back out. If you need help adjusting your walk in cooler doors, read here!

ANNUALLY:

4. Clean your evaporator coil. Unfortunately, this is a lengthy process, but it is extremely important. Evaporator cleaning solutions are sold at refrigeration wholesalers by the bottle. They are specially formulated to clean the type of sediment that can collect over time in evaporators, and are also very easy to use (specific directions will be on the bottle). To begin, turn off the power to your walk in cooler. The drain tube should be disconnected, and the bottom pan of the evaporator coil can then be unscrewed and removed. Clean and disinfect the inside of the pan and follow the package directions to clean the copper tubing and fins of the coil itself. If you are uncomfortable with these procedures, you can always schedule a preventative maintenance service call with a refrigeration technician.

Gasket5. Clean your walk in cooler door gaskets (pictured to the right) with a soft cloth, soap, and water. Repair any small tears with a clear silicone adhesive. To keep them soft and pliable, wipe them down with a vinyl preservative, commonly sold at automotive supply stores. If a gasket should tear beyond repair, it’s worth being replaced—without a gasket, there will be significantly more wear and tear on your walk in cooler’s compressor.

Wednesday, August 17, 2011

Servicing Your Walk in Cooler

Like all equipment, refrigeration systems can malfunction. If that happens, we understand you need assistance quickly. We know it can be very stressful when your product is no longer staying cold! Who should you call first? Well, that depends...

If within initial 90 day labor period (factory installs only):

Your first call should be to SRC at our toll-free number: 800-521-0398. Our service department will determine if a service call is required and make the arrangements for you. If the failure is over the weekend or during a holiday and you can't wait to contact us, you can call our installers directly. If the repair falls under our equipment warranty, you will be reimbursed for the straight-time service charges incurred. You will only be responsible for the premium overtime amounts. Make sure you call our service department to inform us of the problem when normal business hours resume.

Beyond the labor warranty period:

Since you will be responsible for the labor portion of the repair, you are free to call any service provider you would like (as well as the original installers). You can also call SRC’s service department and we will gladly coordinate the call for you. If the technician determines that a part or component is defective and you are still within the one-year parts warranty, please have them contact our service department for replacement parts. Compressor motors are covered for a five-year period. Once again, have your technician contact us for instructions.

If you are unsure about your current warranty coverage:

Please call SRC’s service department. We will be happy to pull your job file and explain your existing coverage.

Friday, August 12, 2011

Emerson Climate Technologies Introduces Electronic Unit Controller for Refrigeration Condensing Units

SRC buys quite a few condensing units from Emerson Climate Technologies. They are a business segment of Emerson, one of the world's leading providers of heating, air conditioning, and refrigeration solutions for residential, industrial, and commercial applications. The group combines best-in-class technology with proven engineering, design, distribution, educational, and monitoring services to provide customized, integrated climate-control solutions for customers worldwide. They recently came out with a new product, and I wanted to post it here! READ THE FULL NEWS STORY HERE.

Emerson Electronic Unit Controller

Controller Simplifies Setup While Decreasing Number of Costly Callbacks and Time-Intensive Repairs for Contractors

ST. LOUIS, July 25, 2011 – Emerson Climate Technologies, Inc., a business of Emerson (NYSE: EMR) is pleased to announce the launch of its new Electronic Unit Controller for Copeland® condensing units with low pressure controls. The first-of-its-kind unit controller represents Emerson’s continuing commitment to enhance condensing unit and commercial refrigeration system performance with innovative technology.

Emerson’s Electronic Unit Controller is an integrated electronic pressure control solution to replace traditional mechanical low-pressure control switches, while enabling a smarter condensing unit.  Electronic pressure-sensing accuracy maintains a tighter low-pressure control tolerance than mechanical controls to help decrease costly callbacks, while the easy-to use LED interface allows field setup time to be reduced to less than one minute.   “The Electronic Unit Controller from Emerson was easy to install and set,” said Dan Whitten, General Manager of Rosetown Central Refrigeration & Air Conditioning Ltd. “Our technician was very impressed by the accuracy of the pressure readings compared to his service gauges.” In addition to providing precise control, the Electronic Unit Controller features built-in system protection to prevent costly compressor failure and improve operator uptime.

To help contractors more quickly and accurately troubleshoot and diagnose field issues, the Electronic Unit Controller shows current suction pressure, plus stores alarm occurrence codes, discharge temperature trips, and service run time information, all displayed on a large, easy-to-read LED panel.  The controller also features smart fan cycling control through mid-coil temperature sensing on all dual-fan units.

For more information on the Electronic Unit Controller available from Emerson Climate Technologies, read here!

Wednesday, August 10, 2011

Walk in Cooler Leaking Water (Drainage System Malfunctions & More)

(Read here for more general information about walk in cooler drainage systems.)

If your walk in cooler is leaking water, there are two main sources to check...

1) The Evaporator Coil Drainage System

When the compressor is operating, the copper tubing and fins in the housing of the coil are colder than the air inside your walk in cooler. As air is forced through the coil by the fan motor, moisture will collect on these fins. This moisture will form droplets and fall into the bottom pan (this is part of the evaporator coil assembly). From there it will be directed into a drain hose, and eventually into the bucket, floor drain, or electric hot pan.

a) If the drain line becomes plugged or obstructed at any point, water will back up and spill over the edges of the coil. If this is the problem, the walk in cooler will need to be shut down so you can clean out the obstruction.

b) If the coil assembly is not pitched back towards the drain hose, water can pool in the front of the drain pan and leak from screw holes. Drain pans generally have a pitch designed into them, but if the walk in cooler itself is not level or pitched forward, it can defeat this design feature. Recheck if the walk in cooler is leveled properly. If more drain pitch is required, the evaporator coil assembly can be shimmed (allowing the water to flow freely back to the drain).

2) General Air Leaks

Whenever the cold air inside the walk in cooler meets the warmer outside air, moisture will form. Thus, if a floor or ceiling seam is not sealed properly, you may notice condensation or water droplets on your walls or floor. Your walk in cooler should be as level as possible—its seams will be tighter and the doors will shut more securely. Use a 100% silicone caulk to seal any seams where you notice condensation. (Read here for more information on caulking.)

When installed in a non air-conditioned warehouse, some walk in coolers will develop condensation on the outside of the walls or entry doors when the weather is warm and/or humid. Unfortunately, there is little that can be done to alleviate this situation. Sometimes, air movement in the form of a floor or ceiling fan can help reduce or eliminate the problem.

Wednesday, August 3, 2011

Caulking Information: How to Make Your Cooler Airtight

Walk in Cooler Panels

Normally wall and ceiling panels will lock together tight and not require caulking—the only exception is when it is difficult to get the box completely level and square. In that case, caulk any walk in cooler panels that are not entirely tight to prevent air infiltration.

The only panel seams you need to caulk will be at the floor and ceiling perimeter joints. Apply a generous bead with the silicone we have provided, and using a caulking tool or even your finger, smooth the bead out so that good adhesion is made to both surfaces. Clean up can be performed with mineral spirits. Leave the doors of your cabinet open until the silicone cures and the vinegar-like smell diminishes.

Display Doors

If your walk in cooler includes display doors, run a bead of silicone around the entire inside perimeter of the frame after installation. If the gap is too large for silicone, stuff fiberglass insulation or backer rod to fill the joint instead. The same applies for glass viewing windows. Make sure they are well sealed prior to the window trim being secured.

Refrigeration

All refrigeration or electrical lines penetrating the walls or ceiling need to be sealed. In addition, the inside of all electrical conduits must be sealed prior to entering the walk in cooler. This will help avoid future electrical problems by preventing moisture from collecting inside the conduit. Not all electricians are familiar with this possibility, so it never hurts to remind your contractor.

If You See Moisture…

When your walk in cooler is in operation, if you see any water droplets running down the wall panels or water pooling onto the floor, it indicates warm air is entering the walk in cooler causing moisture and condensation to form. Determine the source of the air leak and seal properly.

What About Larger Gaps?

If you needed to shim your walk in cooler during installation to compensate for an uneven floor, you may be faced with gaps larger than silicone caulk alone can seal.

Minimal expansion spray foam can be purchased at any hardware store or building center. It is sold under various brand names in convenient aerosol dispensing cans. You may need several cans depending on the size of your walk in cooler. The directions on the can will give you an idea of the product coverage.

First, install whatever type of finish trim you had planned for the outside of the walk in cooler. There are many possibilities (for example: vinyl cove base, tile, or wood molding). Having this in place will prevent the spray foam from expanding all over the outside flooring.

Now you can apply the foam underneath the wall panels from the inside of the walk in cooler. If you are unfamiliar working with this product, test spray a small amount into an empty box, and get a feel for how much it expands. This will give you an idea of how much to apply. Apply masking tape over the inside perimeter of the floor if you wish to protect the surface. After the product has finished expanding and has cured, it can be trimmed flush with the wall panel with a sharp knife. You will be left with an air tight seal, and can now finish it off with whatever base trim you choose.

Pictures/Examples

It's always great when customers send SRC pictures of their new walk in coolers (before, during, and after installation!)... But from those pictures, I actually couldn't find one specifically of the caulking process. Instead, through Google, I found a good example of caulking here. If you scroll a bit farther than halfway down the page, you'll see a heading called "Plywood and Seams Finished." Ken writes, "Finished layering the inside with plywood, and then caulked all the seams. Decided to use basic painters caulking, since I had a lot of it on hand." There are several good, up-close pictures posted!

Tuesday, August 2, 2011

New Refrigeration Condenser from Heatcraft Helps Supermarkets

One of SRC Refrigeration's main suppliers of refrigeration and refrigeration products is Heatcraft. Heatcraft manufactures evaporators, condensers, and other top-quality refrigeration products for their five market-leading brands: Bohn, Larkin, Climate Control, Chandler and InterLink. Many products are custom-built so they can satisfy the individual customer's needs. No wonder they sell to more than 70 countries worldwide!

The news story I wanted to share is actually from late May, but still plenty relevant and cool (pun intended)...

STONE MOUNTAIN, GA – MAY 18, 2011 – Heatcraft Refrigeration Products, a leader in commercial refrigeration, introduces its new air-cooled condenser featuring microchannel coil technology. This latest refrigeration solution includes an environmentally friendly design that lowers refrigerant charge by more than 70 percent, helping grocers significantly reduce their impact on the environment and save operating costs.

“In today’s marketplace, supermarkets want more than just a well-made piece of equipment,” said Subodh Sharma, Marketing Director for Heatcraft North America. “They want quality refrigeration solutions that can help decrease energy consumption and provide cost savings. Our new air-cooled condenser was developed with these business goals in mind.

Equipped with a variable speed EC motor that helps maximize energy efficiency, the new condenser also includes an all-aluminum microchannel coil design that offers improved corrosion resistance for a longer-lasting, more durable product – even in coastal environments. It also features an innovative sound reduction technology that lowers sound pressure by more than 50 percent, resulting in a quieter product.

READ MORE HERE...

Monday, July 18, 2011

Email from a Happy Customer: Calvin Borisuk from PureCal Produce

A few days ago, Steve Lemieux, president of SRC Refrigeration, received an email message from one of his customers. Calvin Borisuk purchased a warehouse cooler for the new store he's opening in Lexington, SC, called PureCal Produce. It's always nice to hear back from customers, and I attained permission to post the email he sent us. Calvin also attached pictures of his walk in cooler installation--which he completed himself! It's a very big project to take on, but as Calvin wrote, he saved quite a lot of money by doing so.

Calvin writes,

"As you may recall, I am just starting this company, and this purchase was one of our most significant equipment purchases, so I researched it for months to do my level best to make the 'right' decision. And I can say from start to finish, I am very confident my purchase from SRC was the RIGHT decision. From our initial conversations, through the many revisions of design and complexities of equipment selection, you proved yourself to be a very competent business leader who was not just concerned for your bottom line but also that of the client as well. I truly appreciated your patience and professionalism through the design, selection and decision making process.

Also, I would be remiss if I didn't express my appreciation for your staff. Tiffney VanConant and Betty Squier were most helpful and gracious. I spoke with both of them regarding payment, shipping coordination, and a few bumps that came up and both of them were friendly, patient and always willing to help. In addition, I spoke with Allan Jett during installation and start up and he acted in like kind.  It was a pleasure dealing with each of them and they should be proud of the work they do. I am not sure if you hold team meetings or not, but if you do, feel free to use this letter as an opportunity to recognize these folks and to encourage the rest of your team. I know full well that it is easy for folks to go day by day and not think the work they do matters and I want your team to know that what they all do does.

Lastly, I have attached a few photos of the cooler construction process (my apologies for the quality… I am not a techy by any means) and please feel free to use me as a reference for any other customers who may be a little hesitant about building their own cooler. It wasn't easy but it was simple and straight forward. With a little mechanical know how and A LOT of hard work we had the cooler from truck to operational in 5 days and saved about $10-12,000 in the process.

Thanks again and best of luck to you and your team."

Here are a couple pictures of the walk in cooler installation... (MORE PICTURES HERE)

Thank you again Calvin! We are very happy you're pleased with your purchase, and hope to do more business with you in the future!

For more information about industrial warehouse walk in coolers, read here.

Friday, July 15, 2011

Where Can I Find a Good Refrigeration Man?

The key for long-term dependability is insuring your initial installation is done properly—finding a good refrigeration contractor is important. Following a high quality installation, routine service and maintenance will keep your walk in cooler running at maximum efficiency.

Best places to check:

1) Contact other businesses in your area that use refrigeration equipment. Examples would be floral wholesalers / floral shops, restaurants, bakeries, drug stores, convenient stores, and gas station mini marts. These places are guaranteed to have walk in coolers (or walk in freezers) and refrigeration systems.

2) Larger cities have refrigeration wholesalers that can help. Check the phone directory: "Refrigeration Equipment - Parts & Supplies". These wholesalers only sell to other refrigeration contractors. You can ask them for a few references that would be good for your specific area of business.

3) Call SRC Refrigeration (800-521-0398). We keep an extensive list of contractors we have used over the years. We would be happy to check and see if we can offer a recommendation in your local area. Just call our service department during normal business hours (Monday – Friday, 7:30AM – 5:30PM).

Do I want a large or small company?

Both large and small companies offer different advantages—however, ultimately, the most important aspect is the individual service they can provide your business. Do your research on different companies and see if other customers seem to indicate they are customer oriented. For SRC's personal opinion: We tend to work with smaller contractors. In our experience, since they are owner-operators, they are generally more attentive and customer oriented.

Be prepared…

If your walk in cooler does require service, it's best to have office procedures in place so your staff immediately knows what to do. Display the service company name and phone number in a spot that can be easily retrieved.

Friday, July 8, 2011

Anthony's Energy Calculator

SRC Refrigeration does a lot of business with Anthony, one of the world's leading manufacturers of refrigerator and freezer doors, lighting systems, and display equipment. While browsing Anthony's home page today, I noticed there was a link to an "Energy Calculator" near  the bottom.

When you click on it, you'll find you can calculate a comparison between different walk in cooler door models—not only for annual operating cost, but for annual energy usage... and your energy savings! It's quite a nifty tool if you're in the market for buying a walk in cooler or freezer door (especially if you have a tight budget!). By using their comparison tool, you'll have a better idea which model is right for youand can get the best value for your money. Check it out!

ANTHONY'S ENERGY CALCULATOR

Monday, June 20, 2011

Walk in Coolers: Insulated Floor vs. "Floorless"

Should I buy an insulated floor for my walk in cooler?

No insulated floor will be necessary if you are placing the walk in cooler on a cement slab, at ground level, with no basement or crawl space underneath.

You will need to provide insulation for any walk in cooler placed over a basement, second story, or crawl space. If there is warmer air underneath, condensation will form—the refrigeration will pull heat out of the flooring. The condensation will damage the floor material and space below. If you need to provide protection, you may do so either above or underneath your walk in cooler. Here are a few of your options:

1. The floor of your walk in cooler can be insulated from underneath. Any air leaks will still lead to condensation, so this must be done very carefully. The underside of the flooring is often blocked by obstructions, so this method is frequently impossible. If the flooring is made of an absorbent material, it will need to be protected with sheet vinyl (or a different moisture barrier).

2. You can purchase an insulated floor for your walk in cooler. This will isolate the refrigerated space and prevent any problems with heat transfer. You will also pick up an additional 15% in energy savings on average. A disadvantage will be a 4" step-up into the walk in cooler. An optional floor ramp can be ordered. Nonetheless, disadvantages will seem minor when compared to the expense of correcting any structural damage to a building.

3. Some customers prefer to build their own insulated platform for their walk in cooler. Foam board can be purchased at building centers. Care must be taken to cross-stack the sheets of insulation to eliminate any seams or gaps in the material.

Other floor material questions…

1. Concrete with vinyl or ceramic tile: acceptable for a "floorless" walk in cooler.

2. Concrete with carpeting: do not install a "floorless" walk in cooler on top of carpeting as the high humidity levels will create mildew and odor. Simply cut the carpeting around the exterior of the walk in cooler and remove it. If you wish to save the carpeting or your landlord prevents you from cutting the carpeting, order the SRC reinforced insulated floor for your walk in cooler.

3. Concrete with hardwood: it's recommended you order the SRC reinforced insulated floor for your walk in cooler to protect the beautiful finish from the high humidity conditions.

Exceptions (Important!)...

If the walk in cooler is in a hot warehouse, garage, or outdoors on a non-insulated slab, consider ordering the SRC reinforced insulated floor for your walk in cooler. The energy savings alone can help pay back the cost of the reinforced insulated floor.

Other questions?

If you have a reach in cooler, beverage cooler, keg cooler, beer cave, walk in freezer, floral display cooler, etc., the above information may be slightly different. Please call SRC Refrigeration with any questions! 800-521-0398

Tuesday, June 14, 2011

Why Aren't my Walk in Cooler Panels Properly Locking Together?

The locking mechanisms for our modular walk in cooler panels are referred to as “cam-locks.One side of the panel will have at least two male cams (hook), and these connect to an adjacent panel whose edge has the female cams (pin). The male hook is designed to engage the female pin when the 5/16" cam wrench (provided) is turned clockwise. The pivot for the arm is oddly shaped—as the wrench is tightened, the arm will pull inwards, securing a tight panel-to-panel seal.

Occasionally you will find a male fastener with the hook assembly extended and loose. You will be unable to engage the locking mechanism or lock the walk in cooler panels together. All you need to do is re-cock the locking arm. Insert the cam wrench into the cam mechanism and twist the wrench counter-clockwise until you feel resistance. Continue to turn the wrench until you feel the arm bottom out. The hook will now be fully retracted and in position for normal assembly. Your walk in cooler panels should lock together just fine now!

Friday, May 27, 2011

Coordinating Freight and Unloading Your Walk in Cooler Equipment

We will provide you with tracking numbers (“Pro numbers”) and phone numbers of the delivery terminals prior to delivery. There may be as many as four separate shipments to coordinate since you have purchased equipment factory direct. If you have purchased your walk in cooler equipment on a “self-install” basis, you will be responsible to coordinate these delivery times with the individual carriers. If you have any questions regarding this, please don't hesitate to call us!

It would be best for all walk in cooler equipment to be delivered on the same day—common carrier drivers are not required to unload your shipment, and you will need plenty of man power! A minimum of four people are recommended to unload your walk in cooler equipment (two in the truck, and two on the ground).

IMPORTANT: NOTE ANY DAMAGE OR MISSING ITEMS ON THE FREIGHT BILL AS YOU ACCEPT DELIVERY.

The best way to unload your walk in cooler is to unwrap it on the truck and remove each panel one at a time, carefully inspecting it. Your shipment leaves our factory in perfect condition—following this, the freight carrier assumes guardianship until the time of delivery, at which time ownership is passed to you. Should you sign acceptance of a delivery free and clear of damage, it will be very difficult for you to claim damage at a later time. Of course we will do our best to assist you in filing claims if necessary, but it is your responsibility to perform a thorough inspection of your walk in cooler equipment.

walk in cooler equipment

Our modular construction allows for easy handling; even the largest walk in coolers can be brought inside through standard doorways. A full size wall panel weighs approximately 65 pounds. There is a 4” extension piece at the top of all wall panels (“ceiling valance”). Walk in cooler panels should not be carried by or stored on this valance extension or damage can result. If your walk in cooler includes an insulated floor, there will also be a valance at the bottom of the panel. To avoid scratches, lift each panel off the pallet—don’t slide them across each other.

Indoor compressors can weigh upwards of one-hundred pounds; outdoor compressors weigh several times this amount. If your order includes glass doors, these crates can be awkward and heavy as well. This is another reason to have adequate personnel on hand for delivery.

Friday, May 20, 2011

Walk in Cooler Installation Procedure

BACKGROUND INFORMATION:

Regardless of style, all walk in coolers begin from the ground up. Site preparation will be the key to success. The existing floor should be sound, smooth, level, and made with a non-absorbing material. If the existing concrete floor is visibly flawed, consider having it leveled prior to your walk in cooler installation—the walk in cooler must be level for the doors to seal properly. If you don’t have it leveled, the walk in cooler will have to be shimmed to compensate. Shimming the walk in cooler walls will result in gaps underneath—these will need to be sealed. If the wall panels can rest snugly to the floor, you’ll only need a bead of silicone caulk to form a tight seal. Look up as well, and make sure there aren't any pipes, ductwork, sprinkler heads, etc., in the way. These will be easier to modify or work around prior to your walk in cooler installation. The overall height of your walk in cooler will be shown on our drawings.

LEVELING & ADJOINING WALL PANELS:

If you have to work with a less than perfect floor, the first step will be to determine the highest point with a carpenter’s level. This is the point where you should begin the installation of your walk in cooler. As you lock together the adjoining panels, use shim stock to raise each seam in line with the starting panel, keeping everything square and plumb as you go (unfortunately, there are no guarantees that the walls of your building are flawlessly square and level). Leave at least a few inches of space between the walk in cooler walls and the walls of the building. A trick we use is to lay dimensional lumber at the base of the wall and press the wall panels up against it. This provides an even spacing and gives the panels something solid to rest against. The gap left between the walk in cooler and the outer walls can be enclosed following installation.

FLOOR PANELS:

If your walk in cooler includes an insulated floor, each floor panel will have to be leveled as it is set in place. Shims must be evenly spaced under the panel; it will sag with use over time if only the outside edges are shimmed. Once the floor is leveled and locked together, the walk in cooler wall panels can be set in place. No further leveling should be necessary since the wall panels rest directly on the insulated floor.

CHECKING MEASUREMENTS AND ADJUSTING PANELS:

Once all the walk in cooler walls are locked together, you can check the overall square of the box by measuring and comparing the opposite corner-to-corner dimensions. Adjust the wall panels till these measurements are the same. You can now set the ceiling panels in place in your walk in coolerthey should lay square with the wall panels. There should be an even seam along the top with no staggered or saw-toothed appearance. Lock down the ceiling, and install any doors, windows, or partition walls supplied with your walk in cooler kit. All of the rough openings should be square and plumb since you have followed correct installation procedures.

SECURING THE JOINTS WITH SILICONE / CAULK:

Place a bead of silicone in the joint where the walk in cooler wall panel meets the ceiling, and another bead where it meets the floor. If the gap at the floor seam is too large to caulk, use minimal expansion spray foam (purchased at any hardware store). Spray it under the walk in cooler walls and let it expand and harden. Trim the extra off with a knife and finish the base off with tile or cove base. No caulk will be needed wherever there is a rubber gasket seal between the walk in cooler panels. To finish up, use the L-brackets in your parts kit to anchor the inside of the wall panels to the floor.

And you should be pretty much done with the installation of your walk in cooler! If you have questions or run into any problems, don’t hesitate to call us—our service department will certainly help you out. 800-521-0398 / 586-254-0610

Friday, May 13, 2011