Thursday, September 29, 2011

My Glass Display Doors Are Popping Open!

Why it happens:

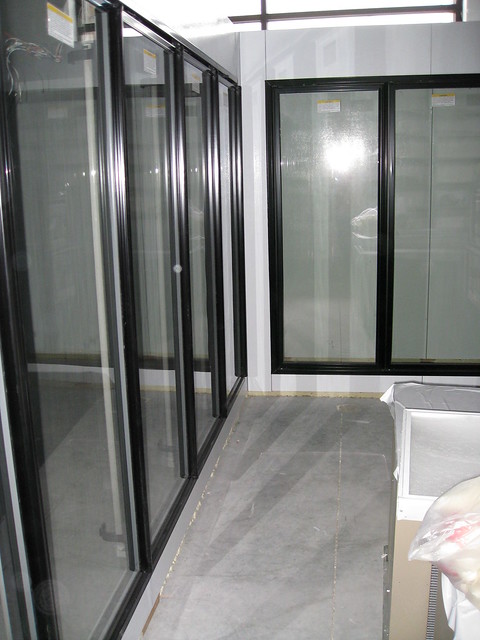
Our walk in coolers are structurally solid and fully gasketed. When properly installed they will form an air-tight unit. When any of the doors are closed suddenly, an air-hammer effect can be created inside the walk in cooler. There will be a positive pressure formed, and this pressure will be released at the point of least resistance. This point is generally the glass display doors, since they are held in place by only the magnetic strips within the gaskets. If the closing tension of the doors is too light, they may stay open, wasting energy.

walk in cooler door torquemaster

What you can do:

This is a relatively easy problem to fix. The bottom hinge mechanism of the Anthony glass display doors is called a Torquemaster. The screw on the face of this mechanism allows you to easily adjust the closing force of the walk in cooler doors. Adjust the screw counter-clockwise to increase the tension. Do not adjust to the point of the door slamming—this can cause problems down the road with the doors.

There is also a screw on the edge of the mechanism. This screw allows you to adjust the square of the walk in cooler door within the frame.

If adjustment of the front screw has no effect, and the walk in cooler door swings loosely with no tension at all, then the torque rod may be broken within the door. This is an easy part to replace; call our service department (800-521-0398 or 586-254-0610) to order the correct rod.

Tuesday, September 20, 2011

How to Properly Seal Walk in Cooler Doors

SLIDING GLASS DOOR MODELS:

All walk in coolers must be level for sliding glass doors to seal properly. If the floor is not level, there may be gaps at the top or bottom of the door seal against the cabinet sidewall. There may also be gaps on the overlap seal from door to door. In addition, the doors will be unable to glide freely and bind instead. Leveling is not a service performed by delivery personnel. Walk in coolers are manufactured to rest on a sturdy, smooth, and level floor. The longer the cabinet, the more it may be affected.

LEVELING YOUR WALK IN COOLER:walk in cooler - sliding doors

If a smooth and level floor is not available, the walk in cooler will have to be shimmed to compensate for any floor irregularities. First, get a collection of wood squares of assorted thickness. You will also need a 4' carpenter’s level and a tape measure.

1. Using the level, determine the slope of the floor. This will tell you which end is the highest. You will want to raise the rest of the walk in cooler until it is level with this end.

2. Next, hold your level flush against the face of the display against the highest end. This will tell you if the walk in cooler is leaning either forward or back.

3. Now you can start to insert shims under the cabinet supports to raise the walk in cooler into position. All four corners of the cabinet may need to be shimmed, as well as the center, both front and back. It will be helpful if two people level. One person can tip the display, while the second person can insert the shims.

4. You will be finished when your carpenter’s level can be placed anywhere against any of the horizontal or vertical surfaces and read perfectly plumb. A final test can then be made. Measure the doorframe assembly from the lower left corner to the upper right corner, and compare this measurement to the opposite corner-to-corner measurement. They should be exactly the same. If they are off, the walk in cooler is still not level. The bottom rail of the doorframe should also be perfectly straight with no sag or bow.

FINAL ADJUSTMENTS TO WALK IN COOLER DOORS:

Leveling your walk in cooler will generally solve ninety percent of seal problems. In rare cases, individual adjustment to the doors themselves may be necessary. If your walk in cooler is now perfectly square, and one of your doors is now out of square in the frame, the following procedure can usually be performed.

1. Remove the door from the display by lifting it up and swinging the bottom of the door out free from the bottom rail.

2. Once the door is removed, you can shim the individual door rollers with washers to square the door within the frame.

Tuesday, September 13, 2011

Adjusting Your Walk in Cooler's Temperature

"Help! My product is freezing. What should I do? How do I adjust the temperature and what should I set it to?"

Here’s what’s going on: Air directly exiting the evaporator coil is approximately 10 degrees colder than the overall temperature in your walk in cooler. So, products placed too close to the coil may be damaged. You could adjust your shelving positions or make a temperature adjustment to warm the overall display. It should be operating between 38 to 42 degrees Fahrenheit. Read below for instructions on how to adjust your walk in cooler’s temperature!

If this does not remedy the problem, perform routine maintenance (read here for help with that). Ensure that the condenser coil is clean and make a slight temperature adjustment to warm your walk in cooler a few degrees. If there is no change, and the compressor is running continuously, there may be a problem with the control system. Place a service call to have your walk in cooler examined.

For more information about possible causes, read HVAC Fun's "Troubleshooting a Frozen Refrigeration Evaporator Coil", or check out our post, "My Walk in Cooler is Blowing Warm Air!"

BEFORE YOU ADJUST THE TEMPERATURE:

First, determine what the true temperature is in your walk in cooler. Immerse a floating aquarium thermometer in a vase of water somewhere inside. This will give an accurate reading as to the current set point. As stated previously, we recommend a setting somewhere between 38 to 42 degrees Fahrenheit for optimum performance. Perform normal preventative maintenance prior to any temperature adjustment being performed. Adjustments should not be made to compensate for poorly maintained equipment.

Now, if your product is freezing, you're probably not going to be lowering the temperature of your walk in cooler. However, I wanted to make this a complete guide, so it's important I mention these next few cautionary tips. Consideration should be given to these factors prior to lowering the temperature of your walk in cooler:

1. Each degree you lower the temperature will consume more energy, leading to higher bills.
2. Compressor run times will increase, decreasing the lifetime of the walk in cooler equipment. More heat and noise will be generated in your store.
3. The possibility of freezing product or iced coils will increase. Product loss wastes time and money—and is not covered by any equipment warranties.

ADJUSTING THE TEMPERATURE CONTROL:Miljoco Temperature Control

IMPORTANT: These controls are very sensitive, so only make small adjustments, and let the temperature stabilize over a few hours. Don’t make any further adjustments before this.

If you determine that an adjustment is required, here are 3 steps to help you do so:

1. Locate the temperature control. Since it is supplied as a loose part for field installation, it may be mounted anywhere on your walk in cooler. Most typically, it will be mounted within the walk in cooler. It is a small unit, usually with two scales, adjustment screws, and a copper sensing probe off the bottom. Electrical conduit will enter the bottom of the control.

*** Be careful! All of our walk in coolers are also equipped with pressure controls and can appear very similar to temperature controls. They are usually mounted as part of the condensing unit. Only trained technicians should adjust these controls. The scales of pressure controls always refer to pressure (P.S.I., bar, etc.) rather than degrees of temperature.

2. There are two scales on the control. One scale measures the set point and the other scale shows the differential. The temperature swing or range of your walk in cooler is determined by the control set point, plus or minus the differential setting, depending on what model you have. It is usually not necessary to adjust the differential of the control.

3. There will be either a screw or a knob located directly above both scales. Turn the adjusting screw above the temperature scale to move the indicator towards the desired setting. Remember to move the indicator in only small increments at a time.

Friday, September 9, 2011

A Few Updates!

SRC has made a few updates to our main website! We added a completely new gallery with several different albums, including walk in coolers/freezers, reach in coolers, and walk in cooler doors. We always love receiving pictures from our customers of their newly installed walk in and reach in coolers, so please, don't hesitate to email us! You can see a list of our email addresses here.

In addition, we've updated our references & testimonials. :)

We will be adding another new album to our gallery soon, so keep a look out! What the album will contain is a surprise!

Thursday, September 1, 2011

My Walk in Cooler is Blowing Warm Air!

Yikes! Your walk in cooler certainly shouldn't be blowing warm air. To begin, visually inspect the evaporator coil. Are the fins iced over?

Frozen Evaporator Coil vs. Normal

If they are iced over, then either shut the walk in cooler down completely, or make a temperature adjustment to the warmest position (this shortens the defrost time). Leave the unit alone until the evaporator coil is completely free of ice—this may take a while if the build-up was heavy. Never attempt to manually defrost or remove built-up ice by hand or with tools as it could easily cause a refrigerant leak! Once clear, reset the temperature control to the correct range (38 to 40 degrees Fahrenheit).

If the evaporator coil is not iced over, or if the icing occurs again, place a service call to determine and correct the cause of the problem.

If the problem is temporary, the unit may have just been in a defrost period. Just to be safe, the settings on the defrost timer should be reviewed and adjusted if necessary.

More importantly, make sure you keep up to date on performing routine maintenance on your walk in cooler. There are some good tips in our post "How to Clean Your Walk in Cooler (5 Guidelines)"!