Friday, May 27, 2011

Coordinating Freight and Unloading Your Walk in Cooler Equipment

We will provide you with tracking numbers (“Pro numbers”) and phone numbers of the delivery terminals prior to delivery. There may be as many as four separate shipments to coordinate since you have purchased equipment factory direct. If you have purchased your walk in cooler equipment on a “self-install” basis, you will be responsible to coordinate these delivery times with the individual carriers. If you have any questions regarding this, please don't hesitate to call us!

It would be best for all walk in cooler equipment to be delivered on the same day—common carrier drivers are not required to unload your shipment, and you will need plenty of man power! A minimum of four people are recommended to unload your walk in cooler equipment (two in the truck, and two on the ground).

IMPORTANT: NOTE ANY DAMAGE OR MISSING ITEMS ON THE FREIGHT BILL AS YOU ACCEPT DELIVERY.

The best way to unload your walk in cooler is to unwrap it on the truck and remove each panel one at a time, carefully inspecting it. Your shipment leaves our factory in perfect condition—following this, the freight carrier assumes guardianship until the time of delivery, at which time ownership is passed to you. Should you sign acceptance of a delivery free and clear of damage, it will be very difficult for you to claim damage at a later time. Of course we will do our best to assist you in filing claims if necessary, but it is your responsibility to perform a thorough inspection of your walk in cooler equipment.

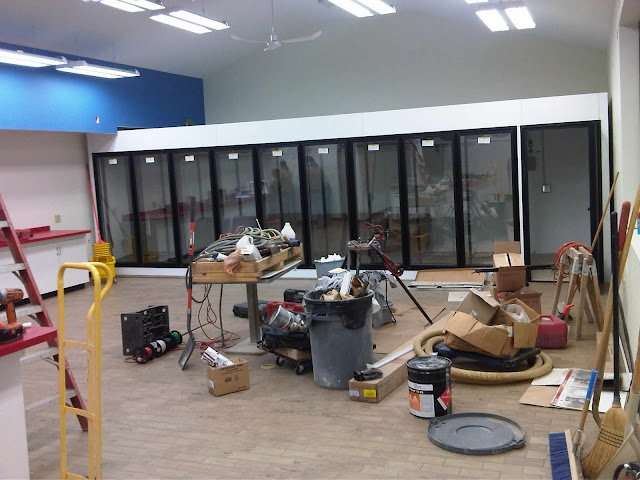
walk in cooler equipment

Our modular construction allows for easy handling; even the largest walk in coolers can be brought inside through standard doorways. A full size wall panel weighs approximately 65 pounds. There is a 4” extension piece at the top of all wall panels (“ceiling valance”). Walk in cooler panels should not be carried by or stored on this valance extension or damage can result. If your walk in cooler includes an insulated floor, there will also be a valance at the bottom of the panel. To avoid scratches, lift each panel off the pallet—don’t slide them across each other.

Indoor compressors can weigh upwards of one-hundred pounds; outdoor compressors weigh several times this amount. If your order includes glass doors, these crates can be awkward and heavy as well. This is another reason to have adequate personnel on hand for delivery.

Friday, May 20, 2011

Walk in Cooler Installation Procedure

BACKGROUND INFORMATION:

Regardless of style, all walk in coolers begin from the ground up. Site preparation will be the key to success. The existing floor should be sound, smooth, level, and made with a non-absorbing material. If the existing concrete floor is visibly flawed, consider having it leveled prior to your walk in cooler installation—the walk in cooler must be level for the doors to seal properly. If you don’t have it leveled, the walk in cooler will have to be shimmed to compensate. Shimming the walk in cooler walls will result in gaps underneath—these will need to be sealed. If the wall panels can rest snugly to the floor, you’ll only need a bead of silicone caulk to form a tight seal. Look up as well, and make sure there aren't any pipes, ductwork, sprinkler heads, etc., in the way. These will be easier to modify or work around prior to your walk in cooler installation. The overall height of your walk in cooler will be shown on our drawings.

LEVELING & ADJOINING WALL PANELS:

If you have to work with a less than perfect floor, the first step will be to determine the highest point with a carpenter’s level. This is the point where you should begin the installation of your walk in cooler. As you lock together the adjoining panels, use shim stock to raise each seam in line with the starting panel, keeping everything square and plumb as you go (unfortunately, there are no guarantees that the walls of your building are flawlessly square and level). Leave at least a few inches of space between the walk in cooler walls and the walls of the building. A trick we use is to lay dimensional lumber at the base of the wall and press the wall panels up against it. This provides an even spacing and gives the panels something solid to rest against. The gap left between the walk in cooler and the outer walls can be enclosed following installation.

FLOOR PANELS:

If your walk in cooler includes an insulated floor, each floor panel will have to be leveled as it is set in place. Shims must be evenly spaced under the panel; it will sag with use over time if only the outside edges are shimmed. Once the floor is leveled and locked together, the walk in cooler wall panels can be set in place. No further leveling should be necessary since the wall panels rest directly on the insulated floor.

CHECKING MEASUREMENTS AND ADJUSTING PANELS:

Once all the walk in cooler walls are locked together, you can check the overall square of the box by measuring and comparing the opposite corner-to-corner dimensions. Adjust the wall panels till these measurements are the same. You can now set the ceiling panels in place in your walk in coolerthey should lay square with the wall panels. There should be an even seam along the top with no staggered or saw-toothed appearance. Lock down the ceiling, and install any doors, windows, or partition walls supplied with your walk in cooler kit. All of the rough openings should be square and plumb since you have followed correct installation procedures.

SECURING THE JOINTS WITH SILICONE / CAULK:

Place a bead of silicone in the joint where the walk in cooler wall panel meets the ceiling, and another bead where it meets the floor. If the gap at the floor seam is too large to caulk, use minimal expansion spray foam (purchased at any hardware store). Spray it under the walk in cooler walls and let it expand and harden. Trim the extra off with a knife and finish the base off with tile or cove base. No caulk will be needed wherever there is a rubber gasket seal between the walk in cooler panels. To finish up, use the L-brackets in your parts kit to anchor the inside of the wall panels to the floor.

And you should be pretty much done with the installation of your walk in cooler! If you have questions or run into any problems, don’t hesitate to call us—our service department will certainly help you out. 800-521-0398 / 586-254-0610

Friday, May 13, 2011

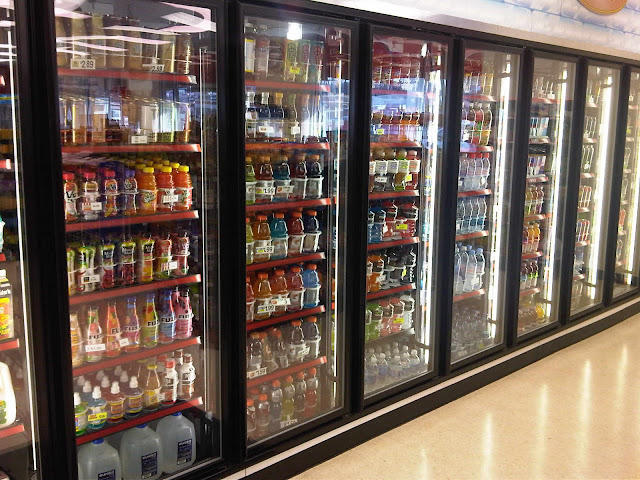
Recent Beverage Cooler (Picture)

SRC Walk in Beverage Cooler

For more information about beverage walk in coolers, you can visit SRC's website!

Can my Company Install the Walk in Cooler (with Minimal Help from Subcontractors)?

You can either subcontract the installation of your walk in cooler OR choose a factory installation, and SRC will coordinate everything for you—there are distinct advantages to each.

FACTORY INSTALLATIONS

Coordination of the deliveries, hiring the subcontractors, and securing proof of insurance / workers compensation coverage will be taken care of. Also, the physical part of receiving, inspecting, and installing your walk in cooler will be completed for you. The larger the job, the more time and energy these processes will take. One major benefit of a factory installation is that it allows you to focus on other areas of your business (sales, etc.). You will also receive a 90-day labor warranty on your walk in cooler equipment following start-up. However, these benefits do come with a price. You will be paying for these services through SRC.

DO-IT-YOURSELF (USING SUBCONTRACTORS)

You can save yourself some expenses by purchasing your walk in cooler equipment on a "self-installed" basis. Having some comfort level in dealing with subcontractors is preferred, since you will be purchasing only the walk in cooler equipment through us (the same as any contractor or builder would). SRC will provide you with shipping information and tracking numbers, but you will be responsible for coordinating the deliveries with the freight lines. Either you or your agents will be responsible for all aspects of receiving, inspecting, and installing the walk in cooler equipment. As a contractor, there is no labor coverage on the walk in cooler equipment (apart from the glass doors). Only the parts and components themselves are under warranty, not the labor involved in replacing them.

SO, WHICH SHOULD I CHOOSE?

If you choose to control the installation yourself, you have the ability to micro-manage the job. Many customers prefer to install the walk in cooler themselves and seek out subcontractors only for the refrigeration and electrical hook-up. It helps if you already have established relationships with installers and are comfortable in dealing with them.

However, on larger projects and new construction where you are already working with a general contractor, it may be wise for you to hire them for the walk in cooler installation also. There may be fewer conflicts if they have full control over the project (i.e. allowing them to work with subcontractors that they are familiar with).

Walk in cooler installation...

walk in cooler installation

Wednesday, May 11, 2011

May 2011 Pictures: Buscemi's New Walk in Cooler

Buscemi's new walk in cooler

PICASA ALBUM: MAY 2011 WALK IN COOLERS

Instead of adding to the older albums of walk in coolers and freezers on Picasa, I decided to make a new album (May 2011) for the recent walk in coolers SRC has manufactured. There are several pictures of the walk in cooler (in progress of installation) we built for a new local Buscemi's. There are also pictures of outdoor walk in coolers, the inside of a few walk in coolers, and some beverage coolers as well. Check it out!

Tuesday, May 10, 2011

Pictures from Liberty USA - Coen Chestnut Oil's New Walk in Cooler!

Coen Chestnut Oil: the construction and use of their SRC walk in cooler!

Bob Erk at Liberty USA, one of our frequent customers, sent this to us! SRC manufactured a walk in cooler system for Coen Chestnut Oil in Pennsylvania. In the video clip, you can see the transformation of Coen Chestnut Oil over time. In the end, there are pictures of a successful, up and running business... complete with a new walk in cooler!

Thank you Bob!